What we will be learning
By the end of this tutorial you should have the following:
- Get comfortable with the Solana tool suite
- A wallet with sol in it (Not real sol, as we will be on the dev network)
- Challenge donate fake SOL to my GoFundMe Dapp
What is web3?
Web3 is a term that is used to refer to the next generation of the World Wide Web, which is expected to be more decentralized and open than the current version. The term “Web 3.0” was first coined in the early 2000s, but it has gained more widespread use in recent years as the technology for building decentralized applications (dApps) has advanced.
Web3 is often associated with blockchain technology and decentralized networks, which are seen as key enablers of the next generation of the web. These technologies allow users to interact with decentralized networks directly, rather than relying on centralized intermediaries, which can provide more privacy, security, and control to users.
Web3 is also often used to refer to the set of protocols, technologies, and tools that are used to build decentralized applications. This includes technologies such as Solana and Web3.js, which provide the infrastructure for building and interacting with decentralized networks.
Overall, the term “Web3” is used to describe the next generation of the web, which is expected to be more decentralized, open, and secure than the current version.
Prerequisites
Install phantom, a friendly crypto wallet. It’s best to install the phantom as a chrome extension.
Install the solana tool suite, which will help us interact with the Solana blockchain.
What is Solana?
Solana is an open-source project implementing a new, high-performance, permissionless blockchain.
Getting Started with Solana
In order to interact with Solana we need to connect to a blockchain that supports the Solana protocol. We could deploy our own Solana blockchain locally which would be a great way for testing your programs before deploying to a distributed one but would not have any practical use because if you are the master of every node on the cluster then the typical security benefits that come with blockchain technology would no longer apply. For the sake of this tutorial, we will use the dev network Solana provides.
A devnet (development network) is a test network that is used for development and testing purposes, rather than for production use. Devnets are typically maintained by the developers or organizations behind the blockchain platform and are used to test and debug new features, protocols, and other changes before they are deployed to the main network.
In the case of Solana, the devnet is maintained and funded by the Solana Foundation, a nonprofit organization that oversees the development and promotion of the Solana platform. The Solana Foundation is funded through a combination of sources, including grants, sponsorships, and donations from the Solana community and other interested parties.
It is important to note that devnets are not intended for production use and do not have the same security or stability as the main network. As such, they should not be used for mission-critical applications or for storing or transferring large amounts of value.
Run the following command in your terminal:
export SOLANA_METRICS_CONFIG="host=https://metrics.solana.com:8086,db=devnet,u=scratch_writer,p=topsecret"

solana config set --url devnet
If all goes well you should see something like this:
Config File: /Users/joshuabell/.config/solana/cli/config.yml
RPC URL: https://api.devnet.solana.com
WebSocket URL: wss://api.devnet.solana.com/ (computed)
Keypair Path: /Users/joshuabell/.config/solana/id.json
Commitment: confirmed
In order to interact with Solana we are going to need a wallet. Our phantom wallet that we downloaded in the requisites section is actually a wallet that we could use but we want to create another wallet so that we can see how to transfer funds.
solana-keygen newDon’t worry about setting a passphrase just hit enter. It will then show you a pubkey which is a unique id that you can reference to point to your new wallet. If at any point you forget what your pubkey was you can run to see it:
solana-keygen pubkeyLet’s check the current balance of our new wallet. It should be 0 SOL
solana balanceSOL is the native cryptocurrency of the Solana blockchain. It is used to pay transaction fees on the Solana network and can also be used as a store of value or traded on cryptocurrency exchanges.
Hopefully, you are starting to feel comfortable with some of the Solana tools. I’m gonna show you a few more commands that might be useful to know. For anything we do on the Solana chain we will likely need some SOL to perform that action, that’s how it stays sustainable. Luckily on the devnet we have the ability to create SOL tokens, of course, these aren’t really and only provide us the ability to simulate what it’s like to be on the main chain.
To create some sol for your wallet, run this command replacing the pubkey at the end with yours. Sometimes the operation fails just try until it works.
solana % solana airdrop 1 3zdpStpFu2UTZxD55nCsVhyYmJexXvUxGtYjWqXagbSb
Requesting airdrop of 1 SOL
Error: airdrop request failed. This can happen when the rate limit is reached.
solana % solana airdrop 1 3zdpStpFu2UTZxD55nCsVhyYmJexXvUxGtYjWqXagbSb
Requesting airdrop of 1 SOL

Signature: 3Pqw1Jy33x2Z3e5Xp7Nn4WyewF4Ujb8VmrjMuZ3MgafMboinDKw5ePKSUv7hTkKN1A2TCVLnnxurNRLVr5xQX81E

1 SOL
Check your balance again and you should have some SOL in there now.
Congratulations, you now have a wallet with some SOL in it. What if you wanted to send some SOL to another wallet?
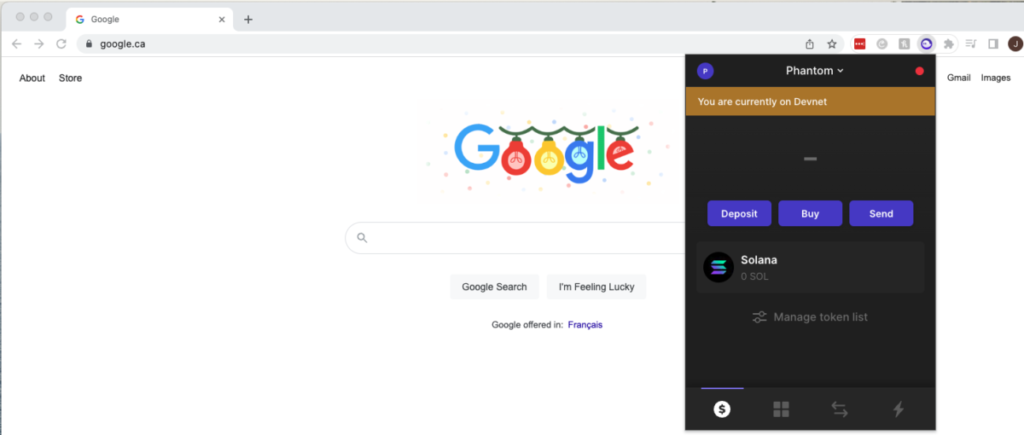
Open your phantom wallet, you may need to create an account. We are also going to have to change our default network. Click on the purple P in the left-hand corner. P > Developer Settings > Change Network > Devnet
You should see something like this:
Finally, let’s get the address of our wallet so that we can transfer funds to another wallet. You can get the by P > Phantom > … > Wallet Address then click it and it should copy it to your clipboard.
the command looks something like this:
from wallet address (Run and copy path to file): solana-keygen pubkey
to wallet address (Copy): P > Phantom > ... > Wallet Address
solana transfer --from <FROM> <TO> [AMOUNT] --allow-unfunded-recipient --url https://api.devnet.solana.com --fee-payer <FROM>
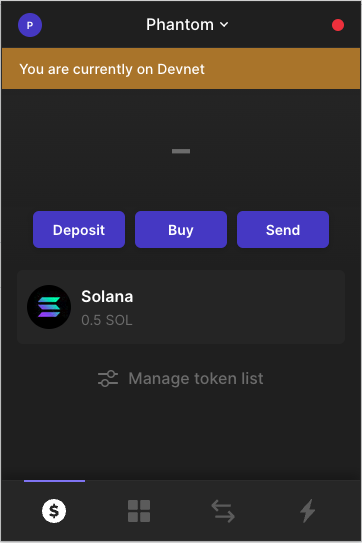
solana transfer --from /Users/joshuabell/.config/solana/id.json Fedx211RP22eLFZEXLaPRjVWYELZQTfPkAmT6bz144mu 0.5 --allow-unfunded-recipient --url https://api.devnet.solana.com --fee-payer /Users/joshuabell/.config/solana/id.jsonVoila
If you just wanted to airdrop some SOL directly into the phantom wallet you can do that as well like this:
solana airdrop 1 Fedx211RP22eLFZEXLaPRjVWYELZQTfPkAmT6bz144mu
Requesting airdrop of 1 SOL

Signature: 5uicxGvU85vP4qnGDUYRQNPQRYdZQBEiUphbKH71PK9n6SaXyxocPuwiMo9YxHActnJ3jRZk1RyrbV6ib6cgQGWw

1.5 SOL
Challenge
Try to donate to my GoFundMe Dapp , hint this was deployed on the testnet. You can find connection specifics here.