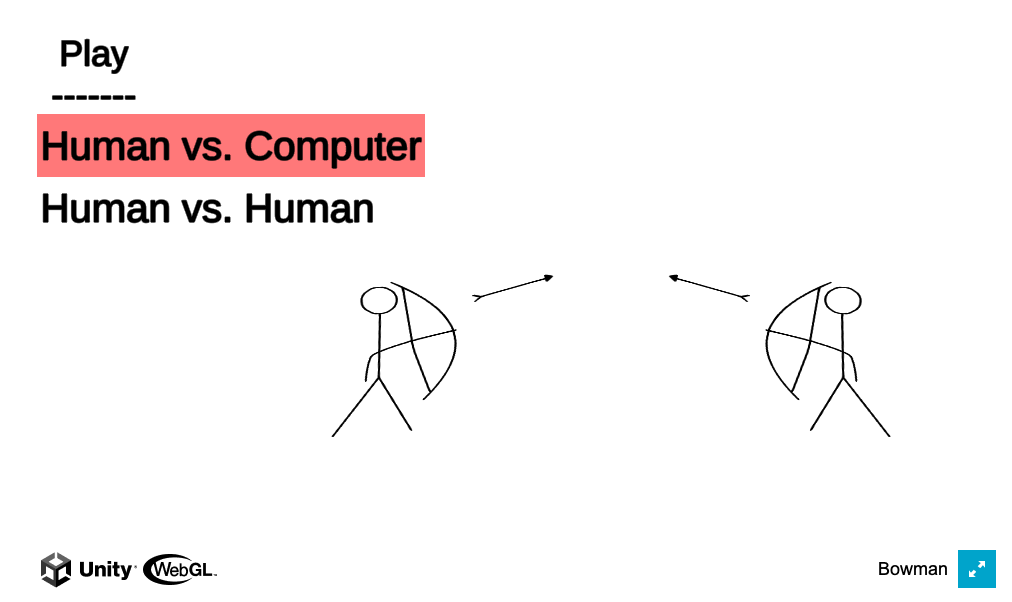
Play here.

We will be making a game called Bowman. Each player has 3 lives, every time an arrow hits a player they will lose a life. The player will be able to take aim and shoot an arrow with various angles and power, ultimately changing the arrow’s final destination. This game is so much fun and I hope you like building it as much as I did.
What will we be learning:
- Prefabs
- Instantiating objects
- Switching Camera views based on gameplay
If you haven’t already I suggest following this series from the beginning.
Game Design
Mechanics
- Mechanism to shoot an arrow
- Determine when 3 lives are up
- Follow an arrow that has been shot
- A menu to play 2 people or play a computer (if you have no friends)
Player Experience
- Relaxing and joy
Game loop
Until one of the players have been hit 3 times.
Prerequisite
- Create a 2D unity project, call it Bowman
- Download and import the game assets into your assets window
Getting Started

The first thing we want to do is add a stickman that can shoot arrows. We are going to break this up into steps.
- The bow should follow your mouse around a central point to mimic the angle of an archer.
- Shoot an arrow, it should follow an arch-like it would in real life
- Adjust the power of the shot, to make the arrow travel farther or shorter.
Step 1)
Create Empty > Bowman
Add the Man image as a child
Create Empty > Bow, Add this as a child of the Man. Place this object where the Mans elbow is likely to be. This will act as our pivot point for the angle.
Add the Bow image as a child of the Create Empty Bow

Finally, we need to add some code to tell our Bowman how to follow our mouse. Create a script folder and add a file titled Bow.cs
using System.Collections;
using System.Collections.Generic;
using UnityEngine;

public class Bow : MonoBehaviour
{
   [SerializeField] float original_x = 0;
   [SerializeField] float original_y = 0;
   [SerializeField] float angle = 0;
   void Update()
   {
       BowDirection();
   }

   void BowDirection(){
           //rotation
           Vector3 mousePos = Input.mousePosition;
           mousePos.z = 0;

           Vector3 objectPos = Camera.main.WorldToScreenPoint(transform.position);
           mousePos.x = mousePos.x - objectPos.x;
           mousePos.y = mousePos.y - objectPos.y;
           original_x = mousePos.x;
           original_y = mousePos.y;

           angle = Mathf.Atan2(mousePos.y, mousePos.x) * Mathf.Rad2Deg;
           transform.rotation = Quaternion.Euler(new Vector3(0, 0, angle));
   }
}
Step 2)
Let’s shoot some Arrows.
Add Image > Arrow > 0000, rename to Arrow. In order to apply any physics to our arrow, we will need some handy dandy colliders and rigid bodies! Let’s edit the image in the Sprite Editor first to add a custom physics shape.


So far we haven’t learned anything new, but we will take a look at Prefabs now.
Prefabs
What is a prefab? Essentially it’s a class for a gameObject. You have the ability to create a template that all other objects created from this prefab will inherit. Like a Class, you also have the ability to override the properties of these objects. It will make more sense with an example.
Let’s create our first Prefab, in the Assets folder create a new folder called Prefabs. Then drag the arrow object into the new folder.
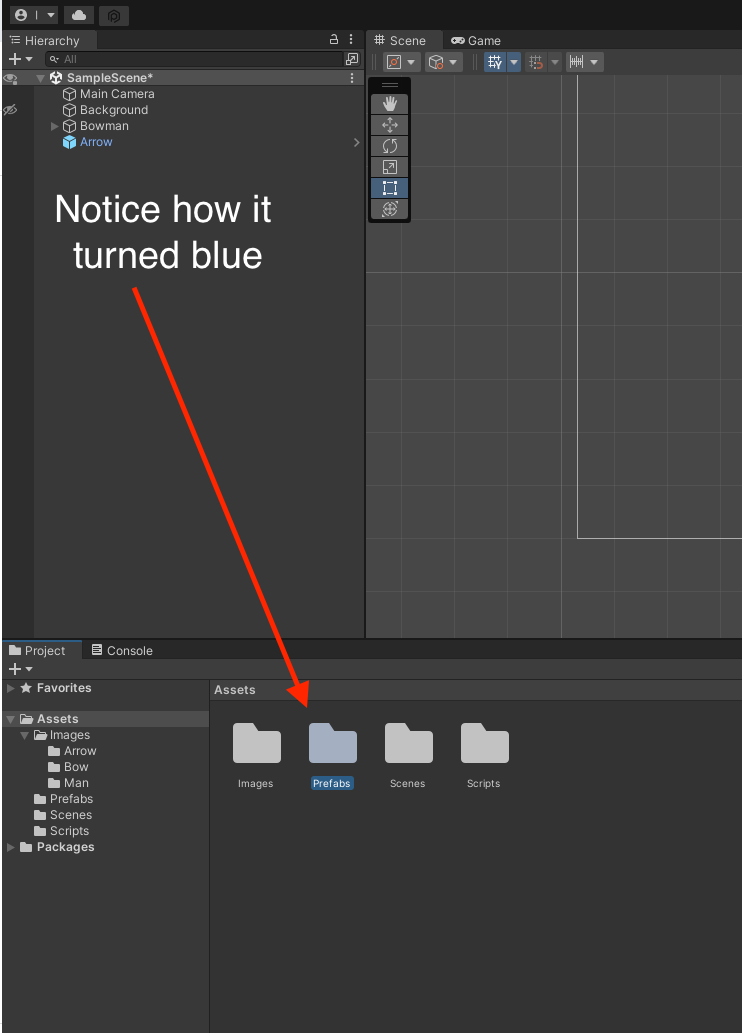
Now we can create a duplicate object by dragging our prefab object into the hierarchy. Its important to note that if we make a change and we want it to apply to all similar objects we need to tell unity.
Create an object from our arrow Prefab, and rename it to Arrow2. Then change the color of the sprite.

Now if you go back to Arrow you will notice that the color is still white. To apply this change to all the Arrow Prefabs go back to Arrow2. Inspector > Overrides > Apply All

Now go back to Arrow, you should see that the sprite color is updated as well.
Feel free to delete Arrow2 at this point as it was just for demo purposes.
Instantiating objects
Now we have an object we can instantiate and shoot. Lets add some more code to our Bow.cs.
[SerializeField] GameObject Arrow;
   [SerializeField] GameObject ArrowOffset;
   [SerializeField] float power = 1500;
   void Update()
   {
       BowDirection();

       if (Input.GetMouseButtonUp(0)){
           Shoot();
       }

   }

   void Shoot(){
       GameObject ArrowIns = Instantiate(Arrow, ArrowOffset.transform.position ,transform.rotation);
       ArrowIns.GetComponent<Rigidbody2D>().AddForce(transform.right * power);
   }
The Arrow object is the Prefab we just created. ArrowOffset is the location you would expect the arrow to shoot from, this can be a child of the Bow. The power variable will be used to calculate how fast we want the Arrow to travel. Finally, our Shoot() method will get called when a MouseButtonUp is detected.
Don’t forget to connect our Arrow Prefab in the editor.

Warning: My code is working but when I click the play option I cant see my Arrow shoot. This is likely because of the sorting layer.
Beautiful now we have a shooting arrow. Play with the power on the side to see different speeds. One thing you may notice is that the arrow shoots in a straight line. We want our arrow to follow an arch shape to look more real.
Create a new script under Assets > Scripts > Arrow.cs attach this script to the arrow prefab.
using System.Collections;
using System.Collections.Generic;
using UnityEngine;

public class Arrow : MonoBehaviour
{
   Rigidbody2D rb;

   void Start()
   {
       rb = GetComponent<Rigidbody2D>();
   }

   // Update is called once per frame
   void Update()
   {
       trackMovement();
   }

   void trackMovement(){
       Vector2 direction = rb.velocity;

       float angle = Mathf.Atan2(direction.y, direction.x) * Mathf.Rad2Deg;
       transform.rotation = Quaternion.AngleAxis(angle, Vector3.forward);
   }
}
Warning: don’t forget to Inspector > Overrides > Apply All or it will just apply to that single object and not the instantiated ones.
Sweet now we have some smooth-looking arrows. However, we don’t want to have to adjust the power through the serialized fields. Let’s calculate the power based on how far the user drags their mouse. The Bow script will look something like this.
using System;
using System.Collections;
using System.Collections.Generic;
using UnityEngine;

public class Bow : MonoBehaviour
{
   bool isShooting = false;
   [SerializeField] float original_x = 0;
   [SerializeField] float original_y = 0;
   [SerializeField] float angle = 0;

   [SerializeField] GameObject Arrow;
   [SerializeField] GameObject ArrowOffset;
   [SerializeField] float power = 1500;
   void Update()
   {

       if (Input.GetMouseButtonDown(0)) {
           isShooting = true;
       }
       if (Input.GetMouseButtonUp(0)){
           isShooting = false;
           Shoot();
       }

       if (!isShooting) {
           BowDirection();
       } else {
           Power();
       }

   }

   void Shoot(){
       GameObject ArrowIns = Instantiate(Arrow, ArrowOffset.transform.position ,transform.rotation);
       ArrowIns.GetComponent<Rigidbody2D>().AddForce(transform.right * power);
       power = 0;
   }

   /*
   * Description: Determine the power based on drag position
   * Returns: integer between 0 and 1500
   */
   void Power() {
       Vector3 mousePos = Input.mousePosition;
       mousePos.z = 0;

       Vector3 objectPos = Camera.main.WorldToScreenPoint(transform.position);
       mousePos.x = mousePos.x - objectPos.x;
       power = (float) Math.Floor(Math.Abs(original_x - mousePos.x));

       if(power > 250){
           power = 250;
       }

       power *= 6;
   }

   void BowDirection(){
           //rotation
           Vector3 mousePos = Input.mousePosition;
           mousePos.z = 0;

           Vector3 objectPos = Camera.main.WorldToScreenPoint(transform.position);
           mousePos.x = mousePos.x - objectPos.x;
           mousePos.y = mousePos.y - objectPos.y;
           original_x = mousePos.x;
           original_y = mousePos.y;

           angle = Mathf.Atan2(mousePos.y, mousePos.x) * Mathf.Rad2Deg;
           transform.rotation = Quaternion.Euler(new Vector3(0, 0, angle));
   }
}
So cool we have a fully functional Archer! But our camera angles aren’t very exciting, we should at least follow the arrow once it’s shot.
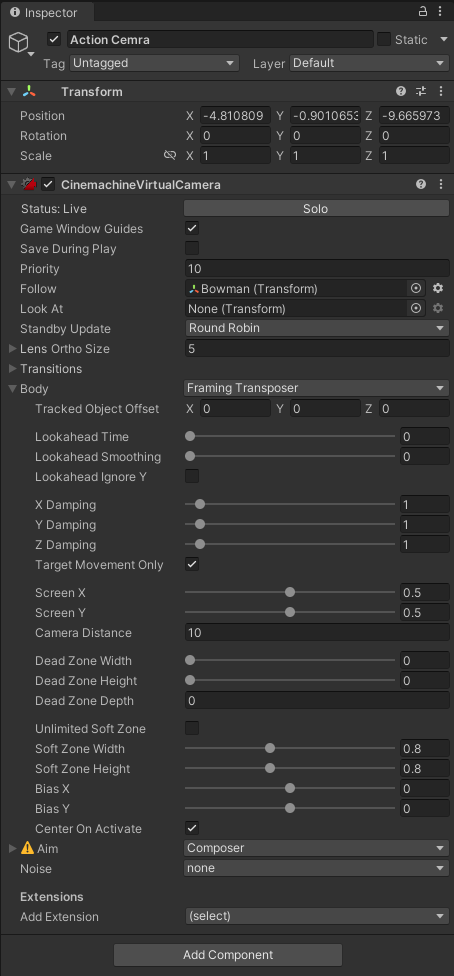
Import the cinemachine package from the unity package manager. Then Create Empty, rename it to Cameras and move the main camera under as a child. Finally Inspector > Right Click > Cinemachine > Virtual Camera, rename to Action camera.

Set the following properties on the Action Camera.
Follow to Bowman
Body > Framing Transposer
Create a new script called CameraManager.cs
This script will follow an instantiate arrow until its destroyed.
using System.Collections;
using System.Collections.Generic;
using Cinemachine;
using UnityEngine;


public class CameraManager : MonoBehaviour
{

   [SerializeField] GameObject bowman;
   CinemachineVirtualCamera _camera;
   Arrow _arrow;


   void Start()
   {
       _camera = GetComponent<CinemachineVirtualCamera>();
   }

   void Update(){
       if(_arrow == null){
           _camera.Follow = bowman.transform;
       }
   }

   public void FollowArrow(Arrow arrow){
       _arrow = arrow;
       _camera.Follow = _arrow.transform;
   }
}
In the Bow.cs we will modify the script to follow the instantiated object and destroy the arrow after 3 seconds.
   [SerializeField] GameObject ActionCamera;

   void Shoot(){
       GameObject ArrowIns = Instantiate(Arrow, ArrowOffset.transform.position ,transform.rotation);
       ArrowIns.GetComponent<Rigidbody2D>().AddForce(transform.right * power);
       power = 0;

       ActionCamera.GetComponentInChildren<CameraManager>().FollowArrow(ArrowIns.GetComponent<Arrow>());
       StartCoroutine(DelayDestroyArrow(ArrowIns.GetComponent<Arrow>()));
   }

   IEnumerator DelayDestroyArrow(Arrow _arrow){
       yield return new WaitForSecondsRealtime(3f);
       Destroy(_arrow);
   }
Warning: We need to add the serialized field mappings in the editor.


Congratulations you have a cool action shot now.
Note: You can fix the choppy-looking arrow by adjusting the camera settings.

That’s a wrap for this tutorial. If you are interested in developing a fully playable game try to add the features of the game at the top. If you get stuck I made the Git repository public so you can pull that down and have a fully working example.
Don’t be shy either if you add your own modifications to the game we want to see, share your progress in the comments!