Install Unity
Go to https://unity3d.com/get-unity/download and click download unity hub.

After downloading and installing it may be asked to create an account, go ahead and create one, sign up for the free version. You can use this license as long as you don’t make more than $100,000 dollars.
What is unity hub?
Unity hub is a tool that allows you to manage different versions of unity. Open it up and install the latest version of unity.

When prompted, unselect visual studio and scroll down and then select WebGL Build Support.

Install VS code
Go to https://code.visualstudio.com/Download , and download. It looks something like this.

What is VS code?
An Integrated Development Environment (IDE), is where you actually code to make things happen in Unity. Usually coded in C# (pronounce see-sharp). It also does things like syntax highlighting to let you know if it’s a keyword or spelled wrong.
What are these tools for?
| Game Engine | Integrated Development Environment |
 |  |
| Visual interface for creating games. | Helps us write code |
| Libraries of existing code to memic physics, rendering, audio, light, etc | Auto-complete, color coding, syntax, and error handling. |
Unity Layout
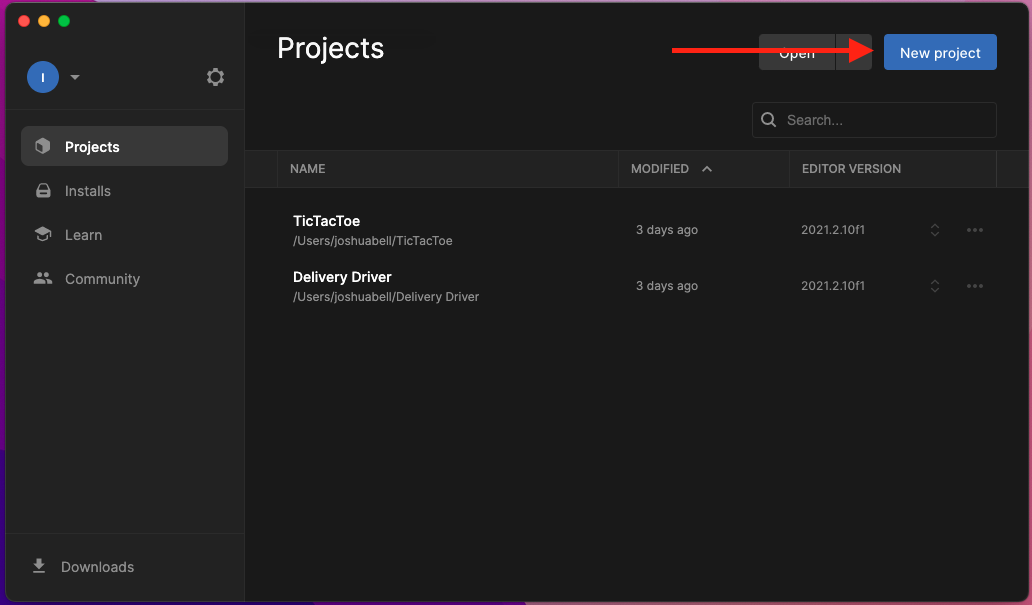
Congratulations we now have all the tools we need to get started! Start by opening your UnityHub and creating a new project, select 2D, and call the project Experiment. Don’t worry about the location default is fine.


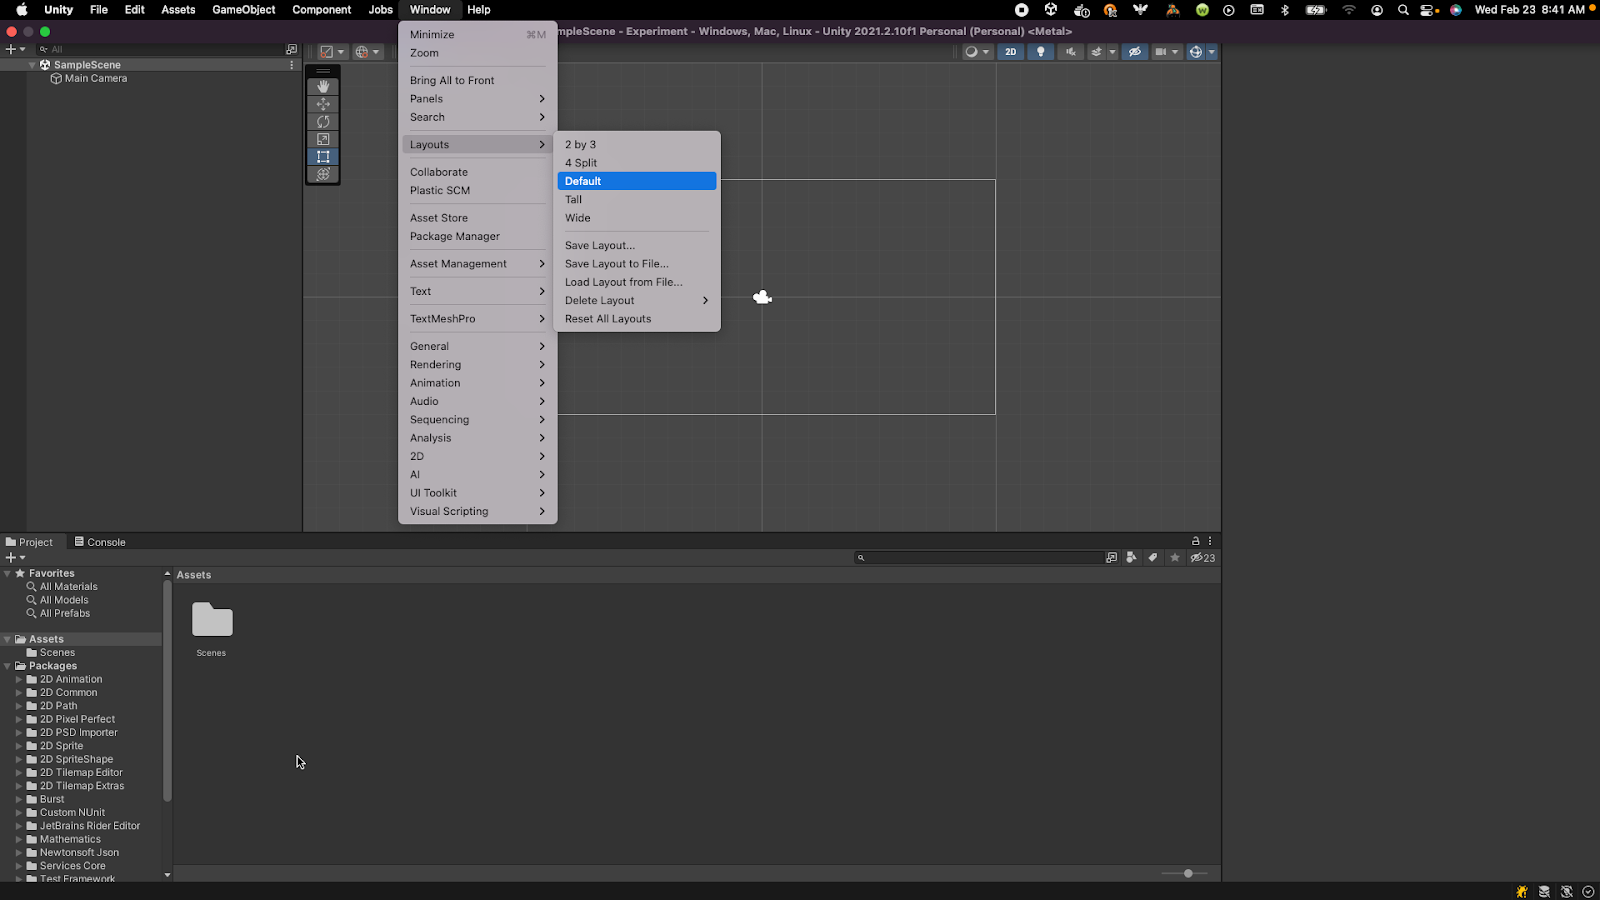
After a few minutes, we should see a screen like this appear.

If yours does not look like this then in the help menu at the top search layout or go to window > layout > default.
This is where you will be designing the game. Let’s point out some key windows.
In the first view, we have 6 important areas to call out.
- Hierarchy: This area allows us to group visually components together. For example, if you were building a house it could be made up of windows, walls, roofs, etc… Instead of these randomly being organized.
- Project: This view is essentially a project folder, this is where all your files will live. Things like C# files (code), images (sprites), music.
- Inspector: When you select a component inside the scene, the inspector will show configurable options for that particular object. If you select an image you may see transform options (Scale, Rotate, Position). If you select something else like music maybe it will show options like volume.
- Scene: The big area in the middle of the screen is known as the scene, this is where you can visually manipulate game objects.
- Console: We will be able to print logs (Text) to the screen from our code. When something breaks or we need insight as to what’s happening the console will help a lot.
- Game: My favorite part, is where you can actually play your game and test it out.


Draw a Picture
You might be saying blah, blah, blah at this point let’s do something cool. I agree, it’s time to draw our very first picture, but first we may need to know some helpful hints. To insert shapes right-click > Hierarchy > 2D Object > Sprites > Square.

You can change the size, rotation, and position by selecting different options in the Scene view.

This can also be done in the Inspector view on the right. In the Scene view clicks on the square, then in the Inspector > Transform try changing the values of Position, Scale, and Rotation.

You can also change the color of the sprite under Inspector > Sprite Renderer > Color.
Challenge Time
Build a picture of anything you like, and then post a picture of what you built from the Game view in the comments.
I decided to build a tree! (Note: there’s a property in the Inspector > Sprite Renderer > Additional Settings > Order in layer that helps you decide which objects should be on top and which ones should be on the bottom. Lower numbers in the back, higher numbers on the top.)

Writing our first piece of Code
The very first thing we need to do is tell unity to use VS code as our (Integrated Development Environment) IDE, which is where we actually type out our code. You can do this by Unity > Preferences and then selecting from the drop-down External Tools > External Script Editor > VS Studio Code.


Then create a file by right-clicking in the Project > Assets > Create > C# Script.

After you select this you will notice the script is highlighted blue and this is where you can rename the file, I named mine PrintToConsole.

If you click away before naming don’t worry you can rename the file by right-clicking on the file and selecting Rename.

Next, we need to attach our script to a game object within our Scene. Select any object from your picture and then drag the script over to the inspector.

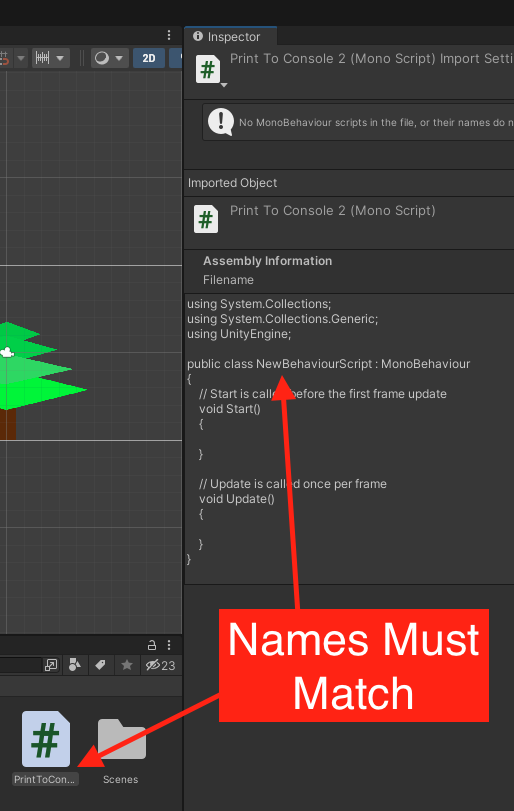
If you get an error message like the one below it could be because your renamed file is different than the Class definition file name.

The first image will not compile, the second image is successful.

Time to start coding
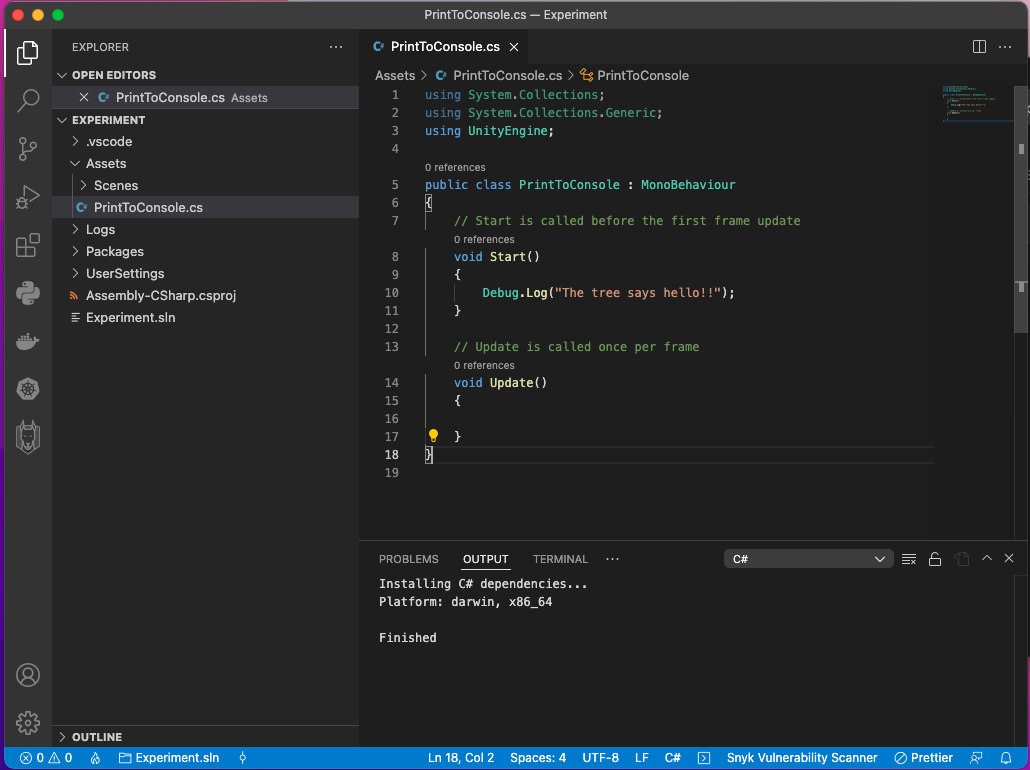
Double click on the script to launch VS Code. It will look something like this

Great now that we’re here we should install some useful extensions. Once you do this once you shouldn’t have to do this again.

Search and install the following extensions:
- C#
- Unity Code Snippets
- Unity Code Snippets Improved
- Debugger for Unity
If you run into this error:
Error: This project targets .NET version that requires reference assemblies that do not ship with OmniSharp out of the box (e.g. .NET Framework). The most common solution is to make sure Mono is installed on your machine (https://mono-project.com/download/) and that OmniSharp is started with that Mono installation (e.g. "omnisharp.useGlobalMono":"always" in C# Extension for VS Code).Click on the download link and install. Then select the C# extension, click on the cog icon, and then select ‘Extension Settings’. This will open up a new window and you want to scroll down the list until you find “Omnisharp: Use Global Mono”. Then, change the drop-down to “always” and click on Restart Omnisharp from the popup window.

You can see that there is already some code that has been added for you, that’s ok if you don’t understand it yet we will walk through this soon. I want to bring to your attention the Start() method. Whatever code lives inside the Start() method will be automatically executed by Unity first when you select the play button.

Our goal is to see some text from inside our code appear in the unity Console. We can accomplish this by adding some code in the Start() method that looks like this.
// Start is called before the first frame update
   void Start()
   {
       Debug.Log("Hello World!!");
   }
And now if we save the file and hit the play button we should see the message appear in the Console.

Challenge Time
Make your picture say something funny and share this output of the Console in the comments.

Pingback: Soccer Ball Pusher – MacroSlice
Pingback: Dirt biker – MacroSlice